Sunday, March 28, 2010

Time for Spring Cleaning!

Woman waxing wood floor

Victorian Library

Well, Spring has officially arrived. That means, in the true Victorian home, Spring Cleaning is upon us! The Victorians used a lot of harmful chemicals and products around their homes. I like to be as GREEN as possible, and try to make my own cleaning products whenever I can. I love the book Clean & Green by Annie Berthold Bond.

But where to begin? Well, after watching TV shows such as Mission: Organization, Clean Sweep and even Hoarders, I guess the first thing to do is...

1) DECLUTTER
Being a Victorian spirit, I guess I am a bit of a hoarder and just collect too much STUFF. I actually enjoy cleaning and organizing, so I always look forward to Spring, when I have a burst of energy and want to tackle the tough projects. A place for everything, and everything in it's place, as the saying goes.

I like to work one room at a time. Anything that doesn't belong in that room, remove it. Place your items in boxes or baskets designated for the rooms where these items will eventually go. When you're done decluttering the first room, move on to the next until the whole house is decluttered.

2) DUST

I start at the top. I like to use my Swiffer to clean any dust or cobwebs off the ceilings and walls. I use a microfiber cloth to clean the tops of the doors and woodwork. I work my way down to things hanging on the walls. Then I do all the furniture and knick-knacks. Dusting usually doesn't take very long, because it's done periodically anyway.

Vacuum <span class=


3) SWEEP and VACUUM

I use a Swiffer on the hardwood floors, then switch to my favorite vacuum of all time, my Sears Progressive canister with a HEPA filter! I use the carpet attachment for my carpeted rooms, the upholstery attachment for the upholstered furniture, and the long skinny attachment for cleaning the refrigerator vents and heating vents, and for getting under anything that is low to the floor. This is also a good time to vacuum out the dryer vent.

4) POLISH AND SHINE

This is a good time of year to polish up everything that is not done on a regular basis. Silver can be cleaned safely by filling a deep tub or sink with warm water. Line the bottom with aluminum foil, and add 1 tablespoon of salt and 1 tablespoon baking soda. Add your silver and let it sit for an hour. The tarnish will be attracted to the aluminum foil. Rinse with clean warm water and polish dry. For tough tarnish, mix a dab of white toothpaste with a drop of olive oil, and rub the tarnish off the silver with your hands.

For furniture polish, mix together 1/8 cup food-grade linseed oil, 1/8 cup vinegar and 1/4 cup lemon juice. Rub into wood with a soft cloth.

5) WINDOWS AND GLASS

My favorite window cleaner is made by combining 1/2 teaspoon liquid vegetable-oil based soap. 3 tablespoons vinegar and 2 cups water in a spray bottle. After I spray it on the windows or glass, I wipe it off with newspaper. Your hands get a bit dirty from the newspaper, but the glass will sparkle! While you're at it, take down the curtains and wash them.


6) STORAGE

It's time to wash your winter blankets and clothing and store them away for the season. Just pull everything out of your clothes closet and dresser drawers, sort, and give anything you don't need to Goodwill. Treat yourself to some fresh drawer liners and sachets while you're at it.

7) KITCHEN

Now is a great time to empty your pantry and refrigerator and dump anything you haven't used or has expired. Clean any hard-to-reach surfaces. Vacuum the vents of your refrigerator. Put a new box of baking soda in the fridge to absorb odors. For a super way to organize your fresh veggies and leftovers, buy clear glass containers for refrigerator storage. They stack well if they're all the same size, and you will be able to see what you have without opening everything first. Glass is the safer than plastic for storing food. You can also use Mason jars in the pantry for storage.

After baking all winter, it's time to give the oven a good cleaning. Spray the bottom surface with water and sprinkle on some baking soda. Spray the baking soda some more and let sit overnight. Then scrub with a soapy abrasive pad. No harmful chemicals or fumes!

8) ODDS and ENDS

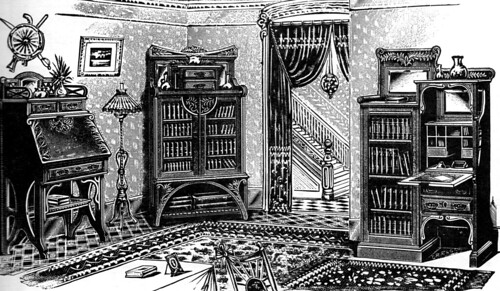
Flip your mattress. Clean and repair bird feeders and bird houses for the garden. Use wood glue to tighten up any loose joints on your Victorian chairs and tables. Clean out the gutters. Remove covers on air conditioning units and clean filters. Mend any clothing and reattach buttons before storing. Start a compost heap. Start a cutting garden for fresh flowers on the table all summer!
Bed

Remember to use safe, natural products to clean your home. It's better for your health, the environment, and your wallet! You don't have to buy expensive green products that are commercially available. Making your own is a whole lot cheaper. Some great, basic products are very safe to use, and have been around since the Victorian days, such as Bon Ami cleaner, Arm & Hammer baking soda and washing soda, 20 Mule Team Borax.

A Right of Spring - Spring cleaning for today
Clean & Green by Annie Berthold-Bond

Labels: ,

Sunday, March 21, 2010

Spring!

American Robin

I love Spring! I can't wait to see the flowers begin to open and smell their wonderful fragrances! The Robins are back and singing up a storm, as are some of our other feathered friends. I love the smell of sunshine on wet dirt. We had some temperatures in the 60's last week, but it snowed again this weekend. Hopefully, it will melt quickly, as the weather is expected to be in the 50's next week. I can't wait to open the windows and let the warm breezes in!

Blue Jacket Hyacinths

King Alfred Daffodil

Persian Lilac

Labels: ,

Tuesday, March 16, 2010

Happy St. Patrick's Day!

Top o' the Morning!

Happy St. Patrick's Day to all from Chicago, Illinois!

We already had our big St. Pat's Parade this past weekend. In Chicago, we do it up big for St. Patrick's Day. We even dye the river green!

There are a lot of people of Irish heritage in Chicago and surrounding suburbs. And a lot of Irish pubs! My husband is about 75% Irish and I'm a wee bit Irish (about 12.5%). We're cooking up a big pot of vegetarian Irish stew for our dinner on the 17th.

I love traditional Irish music and watching Irish dancing! My favorite Irish musical group is Cherish the Ladies. Be sure to see them if they perform in your area. They put on a great show!

Here's a little history of St. Patrick's Day in the U.S.

And finally, if you have 86 minutes to spare, you can watch the excellent PBS special, Irish Chicago, produced by WTTW-Chicago. Not only will you learn a lot about the Irish in Chicago, you will learn about Irish immigration and heritage in America in general. Lots of Victorian era information and pictures!

á Fhéile Pádraig Sona Daoibh!

St. Patrick's Day

Labels:

Saturday, March 13, 2010

The Victorian Stereograph, Part 3 and Beyond

Self Portrait, c. 1990

After I began collecting Victorian stereograph views in the late 1970's, I wondered how I could begin taking stereo pictures myself. I learned that in the 1950's, people had access to modern stereo cameras. An old aunt showed me some 3D slides her husband had taken of my mom when she was young. It was thrilling to see!

Stereo transparency. New Year's Eve. 1952-53
My mom and her parents in 1952!

I wondered... could I just use my 35mm camera, take 2 pictures, paste them side by side and put them in an old stereoscope? I got my brother to pose for me by sitting very still while I took the first picture, then moved about 2" to the right and took the second picture. I couldn't wait to get those pictures developed and try out my experiment.

And it worked! There was my brother in 3D! I started getting my whole family to pose for my new hobby. I even taught my mom how to take pictures for me when she and my dad were going on a trip to Hawaii. She brought back some fantastic shots!

Lava flow, Hawaii.
This photo of lava looks very boring as a normal picture, but in 3D, the effect is amazing!

I began wondering if it would be easier to rig 2 cameras together and have them expose 2 images simultaneously, but the technology was more than I wanted to get into. I ordered various antique and modern 3D cameras through photography stores in New York that I found in ads in photography magazines. The main problem at that time was getting pictures developed. The 1950's cameras took photos on 35mm film, but the photo labs of the 1980's didn't quite know what to do with the strange double images they were getting with my film. I tried developing them in my own darkroom, but that was also a hassle. One camera that I liked for awhile was called the Nimslo. It was designed to take 4 simultaneous images on 35mm film. You were supposed to send it to the Nimslo lab, where they turned your pictures into lenticular pictures, which were plastic-coated ridged prints that had a weird 3D effect without a special viewer. But that wasn't the form of 3D I was looking for.

Realist

<span class=

3D Magic
Just some of the stereo cameras I've tried over the years

Eventually, I went back to just taking 2 images one after the other, and mounting them side by side to view in my antique stereoscopes.

Do you want to begin collecting Victorian stereoscopes and stereo views? Or, as I highly recommend, take your own stereo images so YOUR life will be remembered in 3D? Here's how I suggest you begin.

Buying a Stereoscope

First, try to look through an antique stereoscope before you buy one. They don't work for all people! You can visit antique shops or flea markets and search locally, and try to view any stereo cards they have on hand. If you are amazed by the 3D effect and the price is right, purchase the viewer! They are getting harder to come by! Ebay is also a great place to find antique stereo viewers. You can search by "stereo viewer" or "stereoscope." Make sure the dealer is reputable and knows what he's selling. Sometimes, antique viewers are missing their glass lenses or sliding bars to hold the cards, making them useless.

Holmes style Stereoscope
A typical hand held Holmes stereoscope

I recommend a Holmes-style stereoscope. Sometimes, you can find reproduction or modern versions of this type stereoscope. I've seen some do-it-yourself kits on eBay that look interesting and sell for about $40.00 if you can't find any antique ones. 3D Stereo.com sells 3D stereo equipment and supplies, and has a do-it-yourself pedestal stereoscope kit for $80.00.

Your Camera

You can use almost any camera you feel comfortable with. These days, I just use my inexpensive pocket digital camera for just about everything! Once you take your shots, you need to have them printed out. You can do it at home if you have a photo printer and some photo quality paper. Or you can go to Walmart or any store that has a photo processing machine and do it yourself. Or send away online to sites like Snapfish. I usually get them printed out 4x6.

How to Take Your Photographs

Decide on something to photograph. Ideally, your subject matter will include something in the foreground, middle ground, and in the distance. Stand with both feet firmly on the ground and about a foot apart. Hold your camera in the landscape position (don't take a vertical picture— you technically can, but they're harder to mount).

Aim the camera at your subject. Make sure the camera is held parallel to the ground. Before snapping the picture, make a mental note of what lies smack dab in the middle of your picture. Now snap the first picture.

Now, shift your body about 2" to the RIGHT, without moving your feet, keeping the camera the same distance from the ground and parallel to the ground. Aim the camera at your subject, placing the area that was in the center of the last picture in the center of THIS picture. Now snap the second picture.

If you are taking a photo of a person, make the person holds perfectly still while you take both pictures. When taking photographs this way, people in the background may move, a branch may blow in the wind, a cloud may blow past, or a waterfall or stream may flow. In other words, each photo may have some unavoidable differences. Don't worry! Usually when viewing, your eyes will interpret these things as movement, and will focus on the objects that are stationary. But it is best to avoid taking your pictures when there is too much background movement, or on a windy day! Here are some photos I took as stereo views. Notice how all have interesting depth, which was made even better when viewing in 3D!

Galena, IL.

The <span class=

Starved Rock, IL.

Making Your Stereographs

Mounting your stereo photographs is fairly easy. You need to buy a supply of archival quality card stock, then cut it down into 4" x 7" size cards. The old stereograph cards were normally about 3.5" x 7", but since the new standard in photographic prints is 4" x 6", the 4" tall is easier to work with.

Measure the 7" width with a ruler and mark all your cards at the 3.5" mark. This will be your guideline when mounting each photo.

Make sure you know which photograph was taken for the left eye and which one for the right eye. You'll get used to noticing this over time. If you're not sure, loosely hold both images up to your viewer and see how well each works for the correct 3D illusion.

Trim the left photo to 4" tall and 3.5" wide. Mount it on the left side of the card. Now, before trimming the right photo, place your card in your viewer. Determine where to trim your right photo by putting it loosely in the viewer next to the left photo. You can probably trim the right photo in a similar manner to the left, but it's always good to test it first, because you might have tilted the camera between shots, or not lined things up properly when shooting your photos.

Once you've trimmed out your right photo, test it again in your viewer. The final mounting may be slightly tilted or up/down from the left photo, but that's OK. It might not look perfect glued to the card, but it will look perfect in 3D! (see stereo view of lava, above)

Giant Redwoods, Calif.
Me and some giant redwoods. The true grandeur comes alive in 3D!

Snowy Sidewalk.
Something as simple as this shoveled walkway has 3D that makes you want to walk right into the photo!

The Result

If you've ever taken photographs of what you thought was a beautiful landscape or a great vacation shot, only to be disappointed because they looked so much better in real life that on a flat 2-dimensional picture, you will LOVE stereo photography! I know a lot of you bloggers are into scrapbooking, so you are used to working with trimmers, glue sticks and sticky tapes, and card stock. So believe me, after making a few of these, you'll get the hang of it. The stereo cards you create will NOT look like the Victorian cards did (unless you want to take the extra time to make them as such!). But they will be in full color, and will be a great way to preserve memories in a way you never dreamed possible!

Some great books in my collection may still be available:

Great Stereographic Photography references!

The World of Stereographs - In my opinion, the ultimate book on stereographs

Check out these sites for some great history, photos of viewers and cards, and supplies:


A fantastic site with some great info and lots of pictures of viewers


a bit outdated and technical, but still some good tips


A lot of the better 3D online sites are outdated or out of business. I used to love a site called Rocky Mountain Memories. They sold an excellent viewer that let me mount 4 x 6 photos in an over/under viewing format. Unfortunately, I believe it is no longer available, as they are also out of business. Mounting your prints for viewing in a Holmes-style antique stereoscope is a bit trickier, but I believe most people can figure it out.

If you've read this far and want to experience some of my stereo photography WITHOUT the need for a stereoscope, visit this page. In a process called "free viewing," you will gently cross your eyes to view these images. I admit, it is tiring on the eyes, so don't do it for too long! Also note, the images are pasted in reverse order for these to work for free viewing. They will not work if placed in a stereoscope!

Labels: , ,

Friday, March 5, 2010

The Victorian Stereograph, Part 2

There are so many different themed Victorian stereographs, it's hard to know where to begin! When I started collecting them years ago, I was drawn to different ones for various reasons.

One of the most important things to consider is how the view will look in 3D. I like there to be a lot of depth. Here are some of the themes I tended to go with:

I like to collect pretty ladies in their dresses!

Darling, we'll sing I love you. Universal Photo Art Co. 1904Who Said Rats? Greater New York Stereo Co. 1898

Part of a comic set, Before Marriage and After Marriage. Victorian humor that was probably all too true!

Before Marriage. Keystone View Company. 1896After Marriage. Keystone View Company. 1896

Biddy, the incompetent house maid, seemed to be a really popular theme. Here she is, serving the tomatoes "undressed" by four different photographers!

Biddy, You May Serve the Tomatoes Undressed. Keystone View Company. 1900How Biddy served the tomatoes undressed Strohmeyer and Wyman. Underwood and Underwood. 1897How Biddy Served Tomatoes Undressed. Keystone View Company. 1893How Biddy Served Tomatoes Undressed. Keystone View Company. 1899

I bought this one just because it was so unusual.

The New Year's Callers— Loading the Gun. Am. <span class=

A couple of my Victorian Wedding views. The top one is clearly a re-photograph of an older view, probably reissued when one company bought the rights to one that was closing. Views were often reissued, or you find the same view under different company names.

Sealing Their Bliss. C. H. Graves. Universal Photo Art Co. 1897

Spirit photography really interested the Victorians. There are a lot of stereo views depicting spirits. Here, a young couple envisions their future children by the Christmas tree.


If I recognize a famous person, I will buy it. This is Teddy Roosevelt. See him in 3D, and it's as if you've met him in person!

President Roosevelt at his Desk in the White House. H.C. White &amp; Co. 1902

Since I'm from Chicago, anything from the area or from it's history fascinates me. This one is a view after the Great Chicago Fire of 1871.

Union <span class=

I collect all things from the World's Columbian Exposition, which was held in Chicago in 1893. I have a lot of stereo views from this fair. The first Ferris Wheel was introduced here! The bottom view is from the Centennial International Exposition in Philadelphia in 1876. These deluxe views are taller than most.

World's <span class=Centennial International Exposition. Philadelphia. 1876

Some people like to collect views of places they've never been. I do, too, but more often I collect places I HAVE been to, just to see what it looked like in the Victorian day. Notice the hand-coloring in the first view. These cost quite a bit more at the time!

Climbing the dangerous trail to Glacier Point, Yosemite Falls, Cal., U.S.A. American Stereoscopic Company. 1902State House, Boston, Mass. John P. <span class=Along the Precipitous Trail, Devil's Lake, Wis. T.W. <span class=Under the Snow. H. H. Bennett, Wisc. 1883

You know I love Victorian cats! These are some of the cat stereo views in my collection.

Wake up, you lazy Pussy. <span class=Don't shoot, please, my pocketbook is under my pillow. <span class=Is this your cat? B. W. <span class=

After I had been collecting for some time and learning about the photographers and publishers that produced these views, I started collecting views just because they were from certain famous companies, just to round out my collection.

<span class=View in Park of W.A. <span class=

Some I simply thought were fun!

The Merry Maypole Dance. Universal Photo Art Co. 1894Island Fortress <span class=

One interesting genre that is more hard to come by are the tissue stereo views from France. I pick these up whenever I can. They are photographs printed on thin tissue paper with a cardboard frame. Often there are two layers of tissue: the front tissue is the photograph, and the back tissue is hand painted with watercolor so that when you hold it up with the light behind it, the photo appears in color! Many are also pin-pricked so that lights and jewelry sparkle. Some have secret images that appear only when held up to the light, and some, like the scene at the bottom, turn from daylight to dusk! Tissues were produced in the 1860's and 1870's.

Tissue Stereo View. B. Kuhn <span class=Tissue Stereo View. B. Kuhn <span class=<span class=<span class=

As you can see, I'm all over the place as far as collecting! Be sure to click each one for my Flickr link, which you can view at Large or Original size for a super close-up look! If you have an antique stereoscope, feel free to download them, and print them out to take a look.

Next time, I will show you how you can make and view your own Stereographs! Also, some sources for antique and modern day viewers, and some great links to references!

Labels: , , ,