Kitchen Floor Restoration
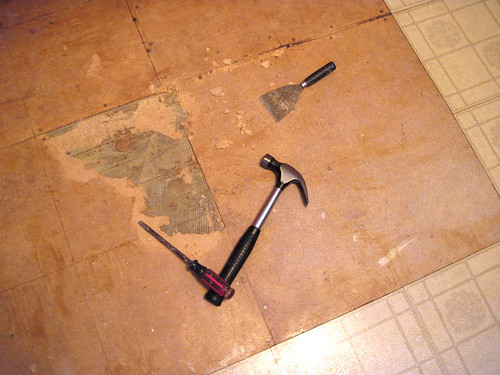
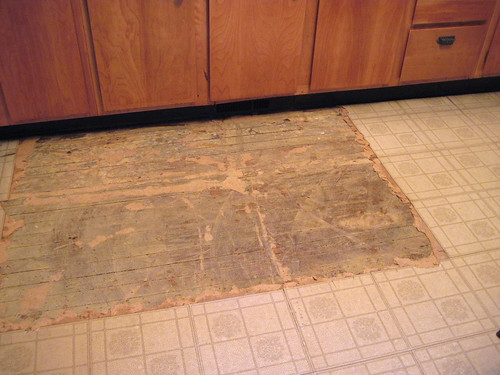
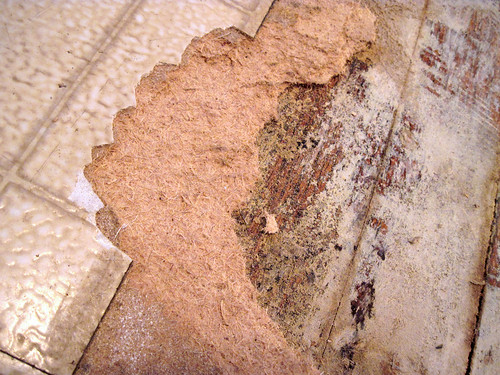
My recent post showing our kitchen really got me thinking; I needed to start renovating this room! The flooring is so ugly. So two weeks ago, I began the task of ripping up the vinyl floorcovering and the underlayment. I started on an area 3' x 5'. I started pulling up the peel-and-stick vinyl tiles first. They came up easily, but left an extremely sticky film on the particleboard underlayment beneath. The particleboard was nailed to the floor below, so I then began breaking it off in pieces, getting as many nails out as I could, and countersinking the nails that broke during the process.
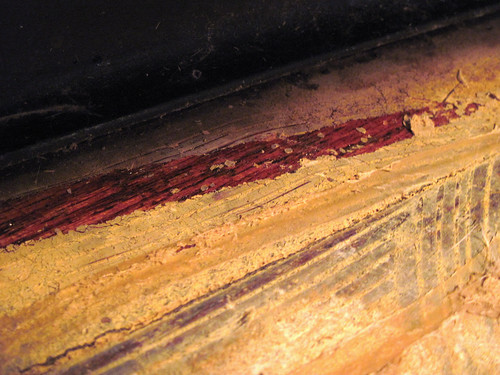
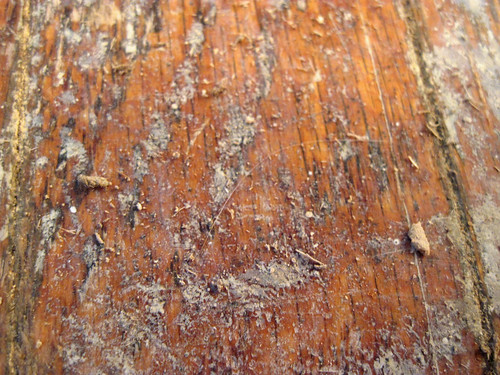
What I found below was a beautiful oak floor! Well, not exactly beautiful. In a couple tiny spots underneath the toe kick near the counter, I found beautiful varnished oak flooring.
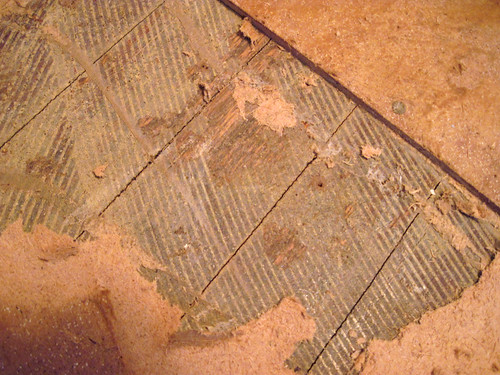
The rest of the floor had a thick layer of old, whitened adhesive stuck all over it. I've read that in Victorian houses, hardwood flooring was used in the public rooms, not in kitchens and second story rooms. I am very fortunate to have original oak flooring in my kitchen! Why anyone would ever coat beautiful hardwood floors with adhesive and cover them with ugly linoleum or vinyl flooring is beyond my comprehension. I believe the adhesive on my floors was from a previous flooring installation, before the particleboard and peel-and-stick vinyl.
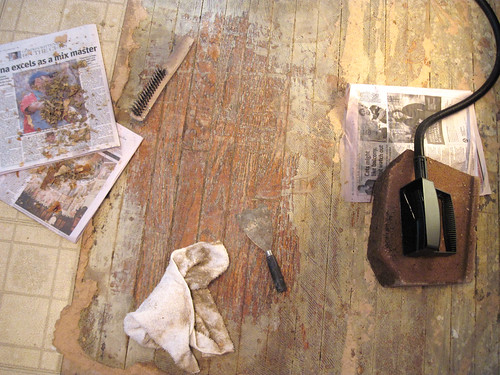
My next problem was how to remove this old adhesive. I scoured the internet, looking for ways other people have found to remove old flooring adhesive. I tried mineral spirits... nothing. Then I tried Goo Gone, which I love to use for removing sticky price tags... still nothing.
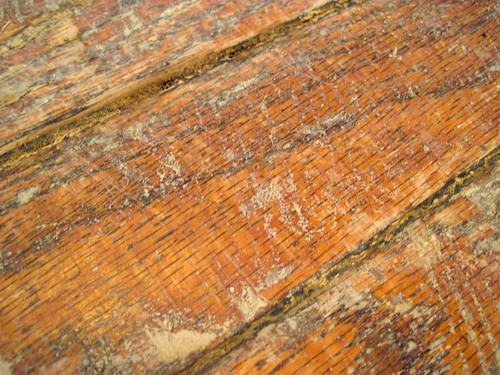
Then I came across a forum where an architect from Milwaukee had used a steamer to soften his flooring adhesive, then scraped it away. I went out and bought a wallpaper steamer and gave it a try. It really does work! It still requires a lot of elbow grease, and there's still a layer of stubborn adhesive scum on the floors. Also, kneeling for long periods of time is not working well for my old arthritic knees! So I've been trying to keep the work to 1 hour increments. When I first started the scraping process, my right thumb became numb and stayed that way for 2 days. But I've always been a proud do-it-yourselfer, so I'm sticking to my guns and getting this project done even if it kills me!
At this rate, it will take no less than 3 months to remove all the floorcovering and scrape the oak floors. I've only worked on it a few weeknights, and mostly only a few hours on the weekends, but I think I will love the end results.

I had thought of renting a floor sander, but I'd like to remove as much adhesive as I can by hand first, since I read adhesive gums up sanders like crazy. The friction melts it enough to clog the sanding pads. I may try a safe soy-based paint remover to see if that does any good on the remaining adhesive. I'd like to keep the integrity of the oak flooring as much as possible, as sanding always removes some wood, and the patina as well.
There's no turning back now. The floor project will move at a snail's pace, but I will get it done! And I am so thrilled that I found the original oak flooring underneath. I'll keep you posted on my progress!
Labels: Kitchens, Restoration
posted by Pam of Eastlake Victorian at
Sunday, March 20, 2011
![]()
![]()


34 Comments:
Yes, please let me know if the soy based stripper works. I have a similar floor in my front entry and it's also covered in that very tough yellow glue residue. Anything that even remotely begins to remove that stuff will be appreciated!
You are, indeed, INTREPID! But what a wonderful discovery and you will be so rewarded when it's done.
There's nothing better to remake a room than new (or in this case, new-old) floors. We have animals and got rid of all our carpeting a few years ago in favor of tile floors (we live in N AZ). I would never go back! Even with my odd mixture of new things, repros and antiques it all works and an "accident" or spill doesn't phase me.
I'll be following your progress with great interest.
You have found antique house treasure. Now, the oak floor may have been part of another room such as a second parlour, a study or even a "mother in law's room" as kitchens were often seperate buildings near the main buildng, that is why you may have an oak floor in there. Can't wait to see what you do with them. It is wonderful to see them come alive. Sea Witch
Hi Vintage Gams-
I will keep everybody posted with what eventually works for me! I'm trying the safest, greenest methods first.
-Pam
Hi Georgene-
I agree, I like floors ( wood or tile) over carpet any day. I do love an oriental area rug here and there, but I know that can be picked up and cleaned thoroughly, unlike wall-to-wall carpeting.
-Pam
Hi Sea Witch-
I had thought of that when I realized the floors were oak. I know the room was not part of the original house, and always assumed it was added on as a kitchen, but maybe it was a second parlor! That's why I love old houses. They always have interesting histories to discover.
-Pam
Hi Pam,
You have my moral support and you are wise to pace yourself. I developed tendonitis in my wrist last season by working on my windows and shutters for too long. But do massage your thumb, hands and knees in the evening after you have worked on your floors.
Courage!
Anyès
XX
Hi Anyes-
Thanks for the moral support! I did start out doing things a little too quickly, because I was so excited about what I was seeing, but have since slowed down my pace. It's fellow bloggers like you who have inspired me to finally get going on projects I have wanted to do for years!
Thank you!
-Pam
I'm cheering you on to your kitchen floor success.
Go Pam. Go Pam. Go Pam.
In every job to be done,
there is an element of fun.
You find the fun, and snap the job's a game.
I'm smiling at your progress. It's so beautiful, like you.
Mrs. D
Hi Mrs. D-
Wow, a cheering section! And Mary Poppins to boot!
Well, I'm off to steam the floor. Just ate a spoonful of sugar, so I'm rarin' to go!
Thanks for the vote of confidence! :-)
-Pam
You have done really nice job. Its good to know that You gotta success in kitchen floor. I know that Its really difficult to remove that old adhesive, But You have removed it very well.
What a lot of work! But I'm sure it will be worth it in the end.
Liz
Thanks, kitchen units!
-Pam
Hi Liz-
That's what I get for buying a fixer-upper! :-) But if I start concentrating on only one room at a time, I think things will get done mre efficiently.
-Pam
It is great that you are putting your mind to it and getting it done!!! It will look beautiful when it is finished. Keep up the hard work!
Hi Garden Girl-
Thanks for cheering me on. :-) It's nice to have so many people there in spirit!
-Pam
Wow, Pam!
I applaud you for your tenacity! I think I would have lost my mind after five minutes and then went and made a martini for myself! LOL! ( I have NO patience!). But I'm sure it will be worth it in the end. Our kitchen also has it's original wood floors; it's the same narrow plank maple as the rest of the house, but has a different color stain. The previous owners had the joy of removing 4 layers of linoleum from on top of it. I have no idea how they did it, though! The only bad thing about ours is that the planks separated and there are small gaps in between all the planks (some of them still filled with rock-like adhesive). Ugh! I don't know if it can be fixed.
Hi Katie-
You crack me up! I know you have plenty of patience, with all the beautiful stenciling and decorating you've done in your beautiful home! You're lucky the previous owners did the kitchen floors. I guess if the old adhesive is between your floor boards, it would be really hard to get out.
-Pam
I applaud you, what an undertaking. We had a farmhouse built 1868 and everytine we would start something it was like opening a can of worms, one thing after another. Great jub, but take it easy.
yvonne
find any maps or money?
Hi Yvonne-
Ha! I wish I found some money! Haven't found anything of value in this old house yet. I know what you mean about opening a can of worms. Therre's just so much to do before I can really do what I want!
Pam, The floor project is a Lulu. I did a little house and it had 22 layers before I hit pay dirt. Houses of your age hardly ever had oak floors like the ones you have found. I would say they were added latter. Ususally they were wide pine, that was ment to be a sub floor. The oak you have shown me is a much latter product. probably placed over the old pine sub floor during a redo. Haveing said that, I used an old electric iron to clean that stuff off my floor. I put a piece of newspaper between it and the stuff and let it set untill the stuff got hot and I could scrap it up. While I was scaping one spot the iron would be heating the next. Went pretty fast. Also you can buy pretty cheap ,a paint gun. It will heat up the stuff and then you can scrape it off. But if the wallpaper steamer is working, far be it. Good luck and stop by anytime. Richard at My Old Historic House
Hi Richard,
I'm using the steamer the same way you used the iron: heating one area while scraping another. So I guess it's basically the heat that's working.
Maybe you're right about the oak floor. When I get to the area that abuts the next room, I might be able to tell if there's a difference in levels. Thanks for your input!
-Pam
http://www.franmar.com/
Check out this site I am using the soy gel stripper for the really old trim in our house it works very good for a soy product. I bet the mastic remover would help with your floor. Good luck.
Hi B & G,
Thanks for the great advice! I'll check out their products!
-Pam
How exciting to find oak floors under the vinyl flooring! I can't wait to see the finished project:).
Blessings,
Kim
Hi Kim-
I was surprised! Now it will look even better than I imagined. :-)
-Pam
Oh what joy....but WHAT A JOB that is going to be... BUT you will be so proud of what you have uncovered when it is all finished.
It's too bad people don't keep a journal of this type of thing so we know what treasures lay below.
We tried to tell our buyers in Indy EVERYTHING we could think of about our olde house...that we had lived in for 33 years, before moving here to Texas. ( *and my parents had lived in it for 15 years before that !)
Things that were IMPORTANT about the house...things we changed and why. Did not want them to find any "surprises". In fact, we gave them our new phone number here..so if they had any questions later, they could call us...we must have done a good job covering things...they only called us once... to tell us the LARGE tree in the back had been hit by lightning and they had to have it cut down...that was too bad, because it was a HUGE SHADE TREE for the back of the house.
Oh and yes, re:- CHICAGO...the house was in Irving Park...do you ever go to that neighborhood for any reason ?
Hey Pam, THANK YOU....for the YOU TUBE advise. it was driving me crazy !
And just today...I found what you found...it was just turned all the way down... by YouTube I guess............CRAZY !!!
Love, Rose
Hi Rose-
That was very thoughtful of you to tell the folks in Indy everything you knew about your former house. Most people wouldn't even think about doing that.
I rarely go to that part of Chicago these days. Just go downtown, where I work.
I'm glad we solved the YouTube mystery! They must have done it, because we didn't change our settings.
Take care!
-Pam
Just ran into your blog after seeing you commented on A Modern Day Victorian Lady's - her civil war ball photos post- and I just wanted to say I love your site!! Just absolutely am in awe of all of it! That's awesome on the floor restoration- sounds like when my Uncles did that on my Grandpa's house- looked wonderful afterwards! It always does! Your victorian parlor furniture is simply adorable too!! I can't wait to take a look at all of your site and admire the splendor! Will write back later!!
- Samantha Jane
Hi Samantha Jane-
Welcome! I see you love " living in the past" too! I admire you reenactors, being able to dress the part so authentially. I look forward to catching up on your blog as well. Thank you for beoming a follower! :-)
-Pam
Those floors are going to look amazing when you are done. You can already see the great grain on them. I had to laugh when you said your thumb had gone numb. That is real dedication if you are willing to risk your knees and thumbs to the job. I can't wait to see the end results. Well, I can wait a few months I guess.
Hi Pam-
Ha ha! I didn't realize my thumb was going numb until I had finished up that day! The floor is going really slowly. In the meantime, I've come up with some plans for the rest of the kitchen that I think I'm gonna love. I can't wait! :-)
-Pam
What a lovely wooden floor. I too love old houses. My very first house was a 1902 victorian that we fixed up before moving to an earth sheltered home. A little eclectic I am! keeps life interesting. Now I am in a 1980 bi-level decorated in the victorian style. Who knows what's to come. Have fun and keep us posted.
~ ~Ahrisha~ ~
Hi Ahrisha-
Thanks for visiting! I'll post updates when I get further along on my kitchen redo!
-Pam
Post a Comment
Subscribe to Post Comments [Atom]
<< Home